Stratton Turner

Internet Industry Journal

Cabinet Painting – Give Your Cabinets a Fresh Look

Cabinet Painting Sacramento is a cost-effective and design versatile option for giving a new look to your kitchen cabinets. You can easily achieve a dramatic transformation in a shorter timeframe than other remodel options.

Cabinet Painting

Paint that is too similar to your wall color can cause the different surfaces to fight for the same color/depth slot and result in a hot mess. Make sure that your colors are more than 20 LRV points apart.

Cabinet Painting is a way to give your kitchen or bathroom a dramatic facelift at a much lower cost than refacing or replacing cabinets. While it may seem like a straightforward weekend project, proper surface preparation is key to ensure long-lasting results and durability.

One of the most important parts of this process is sanding. While many people skip this step, sanding is vital for any successful painting job. Without sanding, the paint will struggle to adhere to the cabinet surface and may eventually peel or bubble. Additionally, sanding smooths the finish for easy handling and a clean look.

Another crucial step is priming. Unlike wall paints, cabinet paints require primer to provide a good surface for the finish. Primer also helps to conceal any stains or discoloration that may exist on the surface of your cabinetry. Lastly, primer helps to seal the surface and prevent bleed from bleeding through your finished coat of paint.

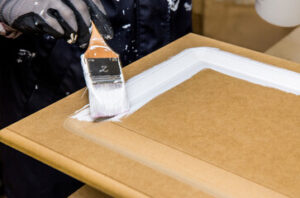
Once the sanding and priming is complete, it’s time to start painting! Start by using a brush to get inside the cabinet doors and drawers and then use a foam roller for any exposed or easier-to-reach areas. Be sure to allow at least 2 hours for the primer to dry before moving the cabinets back into place.

Before you begin, be sure to remove any decorative hardware from your cabinets and place all screws, hinges, or other small pieces in a safe location so you don’t lose them. Next, thoroughly clean the cabinets with a degreaser to cut through any grease and dirt buildup. Once the cabinets are completely cleaned, be sure to tape off any walls, appliances, hood vents, or anything else you don’t want to get paint on.

Primer

While it may seem like an extra step, priming is the foundation of a quality paint job. It creates a strong base that withstands moisture and protects the surface, whether it’s wood or metal. Without it, cabinets often chip, crack and peel. It also helps the paint hold onto its color.

In order to ensure a smooth finish, all surfaces need to be primed before painting. This is especially important in kitchens, where cabinets take a beating from constant opening and closing, steam, and moisture. Cabinet primers like BIN Shellac Primer form a bond between the surface and the paint, helping it to adhere.

After the primer dries, it’s time to sand. Lightly sanding the cabinets improves paint adhesion and removes any sheen. Using an electric sander makes the process much easier and faster.

Once the sanding is done, wipe down the cabinets again to remove dust and residue. Then apply a second coat of BIN Shellac Primer to ensure a smooth and even finish.

Depending on the type of paint you are using, you may also need to apply a basecoat or stain blocking primer. These are especially important if you’re changing the color of your cabinets, as they will help the new paint cover any stains and prevent them from bleeding through.

Whether you are doing a subtle refresh or a dramatic color change, a good cabinet primer and quality paint will help your project look professional and last longer. Don’t skip this crucial step – it will save you time and money in the long run!

Repair

Before you start sanding, it’s important to carefully inspect your cabinets for any damage or areas that need repair. Any cracks or holes should be filled with wood filler and allowed to dry before sanding again. A hammer and screwdriver set are handy tools to have on hand for making small adjustments and tightening loose hinges or knobs. A power drill is useful for more extensive repairs and a putty knife will be needed to apply wood filler to deeper cracks or gouges.

If your cabinet frames have previous paint on them, it’s essential to strip them before you can paint. Stripping is a messy process and it’s important to work in a well-ventilated area. Be sure to follow all the manufacturer’s instructions for using the stripper. If you skip this step, your new coat of paint will be compromised and may flake or peel later on.

After stripping and sanding, the cabinet frames should be primed. A high-quality oil or latex primer is essential to ensure that your new coat of paint will adhere properly and last longer. Once the primer is dry, it’s important to sand and clean the surfaces again with a rag or tack cloth before applying the final coat of paint.

It’s important to take the time to apply your paint evenly and smoothly, especially on the corners and edges of the cabinet boxes. Depending on the color you’re painting over, it may take up to three coats of paint for full coverage and a smooth finish. It’s also important to allow each coat of paint adequate time to dry between applications. This is usually a few days or more, depending on the type of paint and environmental conditions.

Sanding

Often overlooked, sanding is an essential step in the cabinet painting process. It helps to level out any bumps, dents, or rough surfaces and creates a smooth canvas that paint can glide onto easily and evenly, resulting in a more professional and refined appearance. Skipping this step can have negative consequences, including paint that isn’t adhered properly and a finish that looks uneven or discolored.

When sanding cabinets, it’s important to use the right grits of sandpaper. Starting too coarsely can damage the wood or leave gouges in it, while using too fine a grit will remove too much and not provide an even surface. To get the best results, always work with a sanding block or an orbital sander that can be adjusted to your needs.

It’s also important to wear a mask when sanding to avoid inhaling any dust or paint particles. For larger projects, a sanding vacuum can help to keep the area clean and free of debris while you’re working. Finally, it’s a good idea to label where all the hardware goes so you can reinstall it properly when the project is finished.

In some cases, it may be necessary to apply a deglosser or chemical stripper to the cabinets before sanding. These products can help remove any gloss and roughen the surface without the need for sanding, but they aren’t without their risks. Be sure to read the manufacturer’s instructions carefully and follow any safety precautions closely. A deglosser can also leave behind a sticky residue that will make it difficult to clean and can cause the new paint or stain to bubble. If you decide to use a deglosser, it’s essential to prep the cabinets for a fresh coat of primer as well.

Paint

Cabinet painting requires thorough surface prep, including sanding and priming to ensure adhesion and a smooth finish. It is also time-consuming and labor-intensive. In addition, it doesn’t address underlying structural or functional issues. If your cabinets are in need of significant repair, refacing may be a better option.

The type of paint you use is also important. There are special cabinet paints that offer durability and stain resistance, especially for high-traffic areas like kitchens. They are typically acrylic latex-based and can be a semi-gloss or satin finish. Glossy finishes can show imperfections and are more difficult to clean, so satin is a better choice.

If you decide to spray your cabinets, be sure to purchase a high-quality spray paint. This type of paint produces a smooth, durable finish and can cover more surface area in less time than brushing or rolling. It also uses less paint, which can save you money in the long run. Spray paint is also easier to use and generates less mess compared to brushing or rollers. It’s also easier to access hard-to-reach areas, such as crevices and corners, when spraying.

Before you start painting, be sure to remove all the hardware from your cabinets and put it in a bag or box. Label the bags or boxes to indicate where each piece goes when it is reinstalled. It’s also a good idea to protect the floor and countertops with plastic wrap or sheets. Lastly, be sure to cover and seal your tools and brushes between coats to prevent dust or splatter from getting on them. Allow your painted cabinets to dry for at least a few hours before you reinstall them.

How to Plan a Successful Kitchen Remodel

Whether you’re hosting friends or cooking for the family, having an inviting kitchen is essential. A remodel of this popular room is a great way to improve your lifestyle and add value to your home.

Kitchen Remodel

Houston Kitchen Remodeling can involve major alterations, including expanding or knocking down walls. It’s important to have a clear plan for the project and budget in mind.

The kitchen is the center of family life, so it is important to think about your needs when planning a remodel. Whether you cook for entertaining or need a space to manage the daily flow of meals, there are many options available to fit your lifestyle and aesthetic preferences.

When designing your new kitchen, the first step is to create a general layout. This will allow you to see if your existing footprint can accommodate the cabinets, appliances and work zones you want in the space. It may be necessary to rip down walls or build an addition to get the layout you desire. This is where the expertise of a professional kitchen designer becomes invaluable. They are trained in the latest cabinet lines and accessories, can quickly identify potential issues, and can recommend solutions.

Using kitchen design software can also help you visualize your ideas and make good decisions. Whether you want to see the effect of adding an island or changing your countertop, floorplans can be easily changed with RoomSketcher to find the perfect layout and materials for your space.

One of the most important considerations when completing a kitchen remodel is storage. A kitchen needs to be able to hold all your cooking and serving ware, from pots and pans to cookie sheets and cutting boards. The right storage solution can make or break your kitchen remodel project. It is important to measure your current cabinets and make notes, especially in lower drawers where you store tall stock pots and pans, to ensure that these items will fit when your project is complete.

The design phase of a kitchen remodeling project is the fun part and a great time to gather inspiration. There are endless possibilities for color, finish and materials. Use online sites like Pinterest to collect images of the styles you love and start thinking about what features are most important to your lifestyle.

When it comes to kitchen remodels, there are two main categories: remodeling and renovation. Remodeling involves crucial alterations to the structure, layout and style of the kitchen to improve function, efficiency, and aesthetic appeal. This option can involve major structural changes such as removing walls or expanding the kitchen footprint, or it could simply be a matter of upgrading cabinets and appliances to more efficient models.

Layout

For a kitchen remodel to be successful, the layout must accommodate your cooking and entertaining needs. Think about the types of foods you typically prepare, how much counter space you need, and where you place your appliances. Then draw a basic floor plan to guide the process. You can use existing measurements and locations or build a new layout from scratch, depending on your budget and limitations. Remember to include the length and depth of countertops, the height and width of cabinets, and the overhang of lower and upper cupboards. Always double-check your measurements; it’s easy to make mistakes that can wreak havoc on your final design.

The most common kitchen layouts are L-shape, U-shape, and galley kitchens. Each has its own pros and cons, but a U-shape kitchen is ideal for larger spaces because it maximizes storage and allows the cook to move around easily without tripping over appliances or getting in each other’s way. If you opt for a U-shaped kitchen, choose open shelving instead of upper cabinets to maximize your storage potential.

Another option is the one-wall kitchen, which is perfect for small spaces or open-concept homes. This kitchen layout places all the countertops and appliances on a single wall, making it easy to move between them. However, it may not provide enough room for an island or seating area.

Regardless of the layout you choose, it’s important to ensure your kitchen renovation follows safety standards to prevent injuries from fires, scalding, cuts, and other accidents. For example, keep a fire extinguisher visible and accessible in the kitchen, test it at least once per year, and avoid using flammable window treatments over cooking equipment. Also, choose clipped or rounded corners for countertop edges to reduce the risk of injury from falls.

When choosing a contractor for your kitchen remodel, be sure to check their credentials and references before hiring them. The right contractor can help ensure a smooth remodeling project and avoid costly mistakes. They should be experienced in kitchen layouts and be able to work with the local building codes and regulations.

Materials

The kitchen is where family and friends gather, so it’s important to make sure that this space is both functional and beautiful. A kitchen remodel is a great way to upgrade your home and increase its value. However, it’s important to keep your budget in mind and only use high-quality materials that will last for a long time. This will help ensure that you get a good return on your investment when it comes time to sell your house.

One of the best ways to save money on a kitchen remodel is by using sustainable materials. Many of these materials are made from recycled or natural products, and they’re better for the environment than traditional options. For example, reclaimed wood is a durable option for countertops and flooring, and it reduces the need to harvest new timber. You can also choose organic wool insulation to save energy costs and reduce your carbon footprint.

Another way to save money on your kitchen remodel is by choosing low-energy appliances and fixtures. These will reduce your electricity bills and help you save money on utility costs. In addition, you can add natural ventilation systems to your kitchen to manage air flow and reduce the amount of moisture in your home.

You can also invest in a green kitchen by upgrading to more efficient appliances and fixtures. This will save energy and water, as well as reduce your environmental footprint. Many companies offer energy-efficient appliances and fixtures, which can save you up to 20% on your monthly energy bill. You can also upgrade your plumbing fixtures to reduce water waste and save energy.

In addition to these green investments, you can also make small changes that will have a big impact on your kitchen’s aesthetic. For example, you can add a tile backsplash or paint your cabinets to change the look of your kitchen without spending a lot of money.

Choosing the right kitchen remodeling contractor is vital to the success of your project. Look for a contractor that has experience working with eco-friendly materials and designs. You can also ask for recommendations from friends and family members who have used a green remodeling company in the past.

Budget

A kitchen remodel is a major undertaking, and one that can be expensive. However, a properly planned kitchen remodel can increase the value of your home and make it more appealing to potential buyers. It can also help you save money on energy bills and improve your overall comfort level.

There are many things to consider when setting your budget for a kitchen remodel. First, determine exactly what you want to achieve. Your goals will influence the design of your new kitchen and can guide you in selecting materials, appliances and features. Keeping your budget in mind is vital to ensure that you don’t go overboard and end up spending more than you can afford.

The costs of a kitchen remodel vary considerably, depending on the size and scope of the project. For example, a minor renovation may only involve replacing cabinetry and installing new countertops. This type of kitchen remodel can cost between $25K – $75K. In contrast, a medium kitchen remodel might include removing soffits, moving windows, or removing non-supporting walls. This larger-scale kitchen remodel can cost up to $150K or more.

Choosing cost-conscious materials is another way to manage your kitchen remodel budget. Prices for materials can vary significantly, and it is important to research and compare different options. For example, countertop material prices can range from budget-friendly laminate to high-end granite or quartz. Carefully consider each material’s appearance, upkeep requirements, and lifespan to select a material that best fits your budget.

Another way to cut kitchen remodeling costs is by hiring a general contractor or a licensed kitchen contractor. This can reduce your overall project costs by allowing you to avoid paying for multiple contractors, which will save on labor and overhead expenses. Alternatively, you can tackle some of the work yourself to reduce your budget even further.

Adding value to your home is a top priority for homeowners, and kitchen remodels are one of the most cost-effective ways to do this. Studies show that homes with upgraded kitchens sell faster than those without them. This makes kitchen remodels an excellent investment. In addition, they often pay for themselves in the form of increased home equity.